Feeds:
Posts
Comments

Archive for the ‘Kitchen’ Category

What to do with Quince

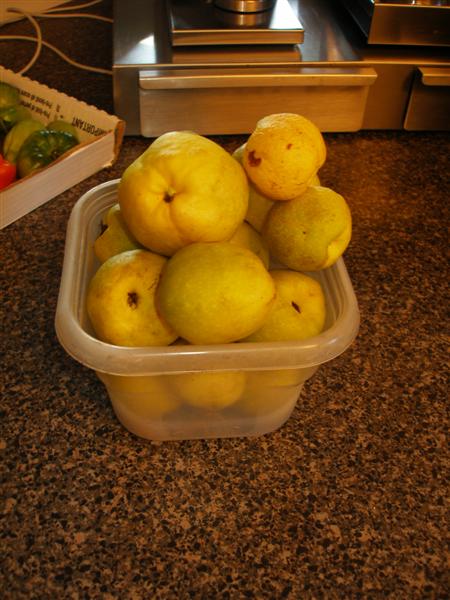
Part of this year’s harvest was two pounds of little quince fruit that came off of the flowering quince bush – the first fruit that bush has produced since we moved into 963 three years ago. I didn’t know what to do with it, plus I didn’t think the fruit was ripe, even though I’d picked them at least two weeks ago and left them sitting on the counter. Turns out quince always stays as hard as rock – well, as hard as butternut squash anyway – so I had waited long enough.

I found one website that said hey, you can make quince paste and put it in a terrine and eat it with manchego and mmm, is that good.

So I googled ‘terrine’ (pretty much like a loaf pan) and I googled ‘manchego’ (sheep’s milk cheese from the Manchego breed of sheep in Spain) and I googled ‘quince paste’ and found a recipe for membrillo (the Spanish version of quince paste). Google also mentioned that membrillo and manchego is the national snack of Spain (not really, but mmmm, popular).

Along the way, I read that when quince is ripe, it smells like vanilla and flowers. I thought that was probably a food lover’s exaggeration until I smelled some of mine, and whoa, did they smell yummy, like vanilla and flowers.

So I followed the recipe for membrillo, and the quince turned a lovely dark pink color like it was supposed to (that seems strange since the fruit is white on the inside, like an apple, and all you add is lemon juice and a vanilla pod and a good amount of sugar to match the astringency, so where does the pink come from?).

It gelled up beautifully and now all we’re waiting for is a Manchego sheep and some of its cheese. And a crisp Riesling to seal the deal.
Read Full Post »

Spring Cleaning in the Kitchen

We’re working through our freezer and the last of our produce from last summer, believe it or not, in preparation for the coming growing season.

All the frozen tomatoes are finally gone, thanks to a couple of nights of spaghetti, and I found a great recipe for sour cherry cobbler, which used up the frozen sour cherries from the senior worker bees’ backyard. We also made the cobbler twice; it was that good.

And last night, we made winter squash soup, which used up the last three squashes that have been hanging around since last September. (I doubled the recipe and used only about a tablespoon of bacon bits, because that’s all the bacon we had. I also just used whole milk, because I didn’t have evaporated milk.) We served it up in blue bowls, and I wish I’d taken a picture, because it looked beautiful and tasted just as good.

Now the seeds are being planted for this year’s garden, and hopefully we’ll have another cornucopia to work through at the end of the summer.

Read Full Post »

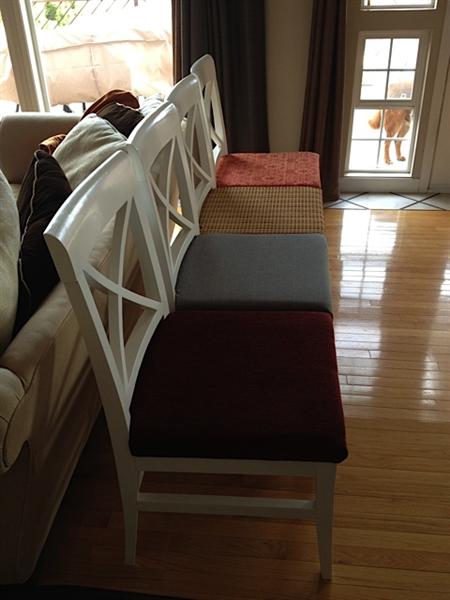
Finally, the chairs are done. It took three coats of paint, but they’re finished. And with all projects, I learned some things along the way that would make me do things differently if I had to do them again, but I’ll save all that for the next batch of chairs somewhere down the line.

The before, times four:

And the after:

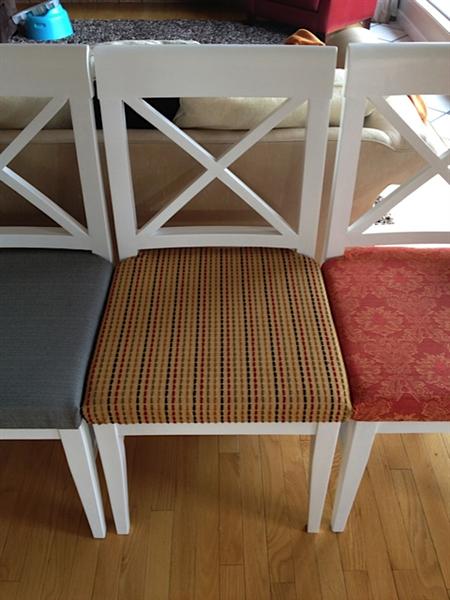
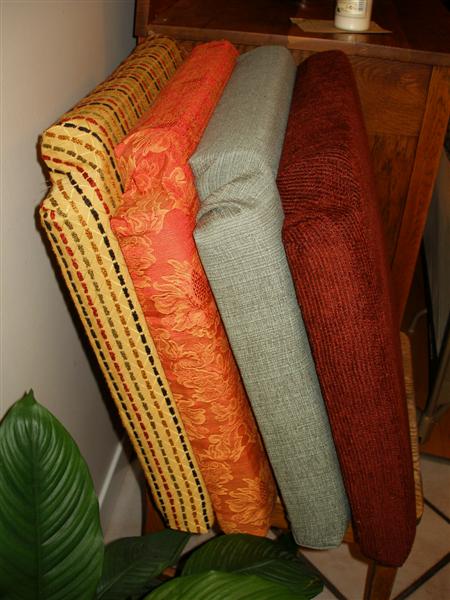
And a few closeups of the seat fabrics:

Done.

Read Full Post »

Sanding Kitchen Chairs

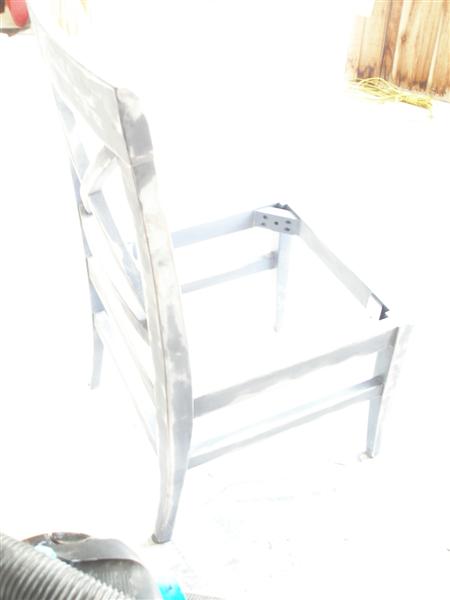
Sanding the chairs is actually pretty easy too. I worked outside in the outdoor room, because my little hand sander doesn’t have a dustbag on it, which means paint dust goes everywhere. (Reminder: wear a good mask so you’re not inhaling it.)

I wasn’t worried about taking all the paint off so just scuffed up the paint job using 180 sandpaper.

I take my inspiration from the very-similar-looking chairs that are being refinished in heaven:

Read Full Post »

How to Reupholster a Kitchen Chair

As it turns out, redoing the seat of a kitchen chair is easy peasy. Mostly because it involves a staple gun instead of a sewing machine.

First, you pop off the seat (ours were secured by four screws) and flip it over to work on its underside.

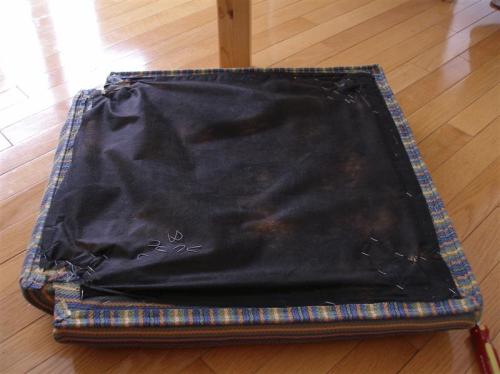
Then you take all the old fabric off (including the black dustcover) by pulling out the staples. I found it easiest to use an upholstery staple remover tool to loosen them, and then use pliers to pull them out since the upholstery tool kept breaking the staple in two.

Underneath the fabric was a piece of plywood that serves as the base of the seat, and in our case, a 2-inch piece of foam that sits on top of it when the chair is right side up. The foam was in great condition, so I didn’t bother replacing that.

Next, I used the old fabric I had just removed as a pattern for the new fabric.

Re. that new fabric, I bought four meters of upholstery ends at the fabric store in four different-but-matching materials for the low price of $10/meter, and there’s enough of each kind to do two seat covers, which works out to $5 of fabric per chair. I figured that if one material doesn’t wear well for whatever reason, I can pop another cover on.

I didn’t worry too much about doing an exact fabric cutting job because I knew I was going to staple the edges underneath the seat where no one would see them.

Then I placed my foam and plywood on top of the new fabric and put one staple in the center of each of the four sides to hold the fabric in place. And then I stapled each side, putting staples in every inch and a half or so and pulling the fabric tight as I went along.

Like I said, easy.

To refresh your memory, here’s the before of the old fabric:

And here’s the after, in the four new fabrics. Don’t they look fresh and beautiful?

Next step: sanding the chair frames.

Read Full Post »

How to Refinish Kitchen Chairs

We bought six solid but ugly chairs from our local Restore, a used building material shop run by Habitat for Humanity. I’ve had four slipcovered Ikea chairs as my kitchen chairs for years, but The Other One finds them a tad too small and uncomfortable to boot, so it’s time to solve the problem. (They are Mama-bear sized, not Papa-bear sized.)

Refinishing kitchen chairs is a project of many steps, and with a baby, you do what you can in the few moments when you can grab a tool and use it before having to put it back down again. That means this project might take longer than usual.

First step: document the initial ugliness. Voila.

The chairs as is (they came from an old restaurant apparently), are painted blue, and the seats are covered with a striped yellow, orange and blue fabric that’s tough enough to last forever and a day. (This photo doesn’t quite do them justice because they look sort of OK in the picture, and they’re really not.)

But! Do not judge a chair by its seat cover. These are beautifully solid, will probably never squeak or require regluing like the Ikea chairs do, and cost a grand total of $20 each. That’s right, including tax. Since all the chairs we were looking at as possibilities were $200-300 each, this was a steal of a deal and worth trying to salvage.

Like I said, we bought six, but only have room around the table for four, so I’m going to start by redoing four. Each chair is going to have a different seat cover too, for a mix and match effect that with any luck, will look eclectic and fun. Or mismatched and odd. However it turns out.

Let the games begin!

Read Full Post »

Greens

I tried growing lettuce (a mesclun mix) and spinach from seed, starting them in some pottery bowls, and it worked like a charm. Here they are in the kitchen window, flanked by thyme and parsley. (Basil and rosemary too, but those didn’t make it into the shot.)

Read Full Post »

It’s Curtains

I finally got some curtains up over the kitchen windows. We had roman blinds for the longest time, but they didn’t do anything to block the view of the neighbor’s deck, which had a clear line of sight all the way through the kitchen and the main room of the house. And since everyone is out on their decks all summer, it was getting to feel just too, too neighborly.

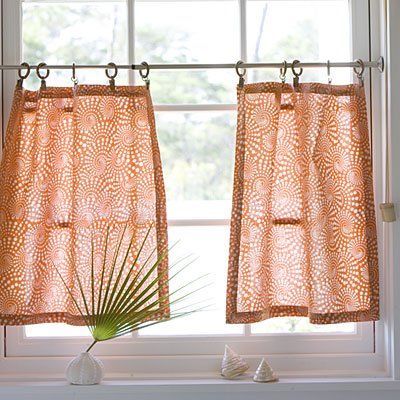
So – I was going to make cafe curtains, the kind that clip to a little rod that hangs across the window, but then read Miss Martha and read that vintage tea towels can work too, since cafe curtains are really just fabric panels hanging in the window. Of course, vintage in Western Canada means about 1972, so I just found some cotton off-white plain curtains with the word “abode” embroidered on them in white, for a bit of design panache, and tried it out. Worked great. Voila, curtains, that look a bit like this.

Photos of our very own curtains to follow someday when it’s sunny, the light is right, and I have the camera in hand, all at the same time.

Read Full Post »

Dumplings!

I finally pulled out my dumpling cookbook this last week,

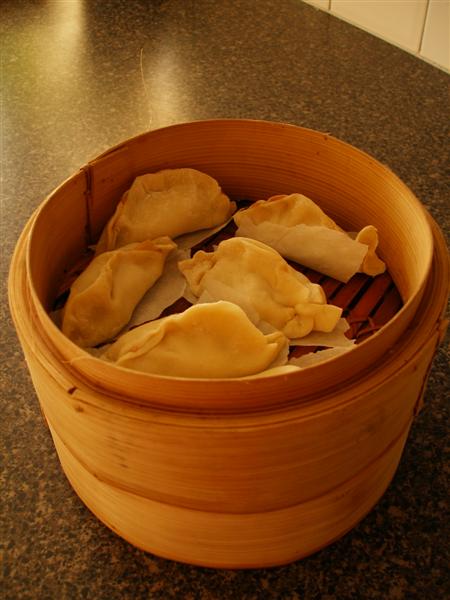
and got to making dumplings, because I love those little parcels of doughy goodness. Now it’s all dumplings all the time. Yum.

Read Full Post »

We finally finished changing out the black knobs in the kitchen that reminded us of beady black eyes every time we went to open a cupboard.

Here’s the before:

And the sleek ever-after:

Read Full Post »

Older Posts »